Simply Pure™ Oil Pen Refill Instructions
Help Save The Earth
 A video tutorial by Erica's Nails and More is located at the bottom of this page.
Disclaimer
Our Bliss Kiss™ Simply Pure™ pens are manufactured as a SINGLE-USE item.
I just happen to have an eco-conscious hubby who figured out how to reuse them!
We like the idea of putting less in the landfills for as long as possible, but we never really know how many times a pen can be reused before it quits.
Some pens break with the first pull. Others last longer. REGRETFULLY, WE CANNOT GUARANTEE PENS WHEN THEY ARE REFILLED.
In an effort to send less plastic to the landfills, Cory and I are encouraging you to recycle your Bliss Kiss™ Simply Pure™ Pens. You can use the dropper bottle to oil your nails and skin too. I use one drop on one nail and then spread that one drop over all 10 nails with my other fingers. ~Ana
To order the Pure Nail Oil Refill Kit, go to
Pro Tips
Cory says to keep twisting it down until you feel it get tight—pay attention to how this feels—and then it will suddenly make a louder pop noise. This is the gear skipping over to the next tooth. It's not broken. Then twist it again until you feel it get to the tightness right before the pop. Use the two grippy pads to pull it apart. That extra pressure makes it easier to pull apart. ...but it's still hard. Put your hands on it with your elbows out to the side and pull with all your might! You might need to wiggle it just a little while you pull. You'll probably feel like you're going to break the darn thing. If that doesn't work, you're going to have to find someone stronger than you. Cory always filled ours until he taught me this trick. I just couldn't pull them apart. He just puts his hands together and "squeezes—just his hand muscles pop them apart!
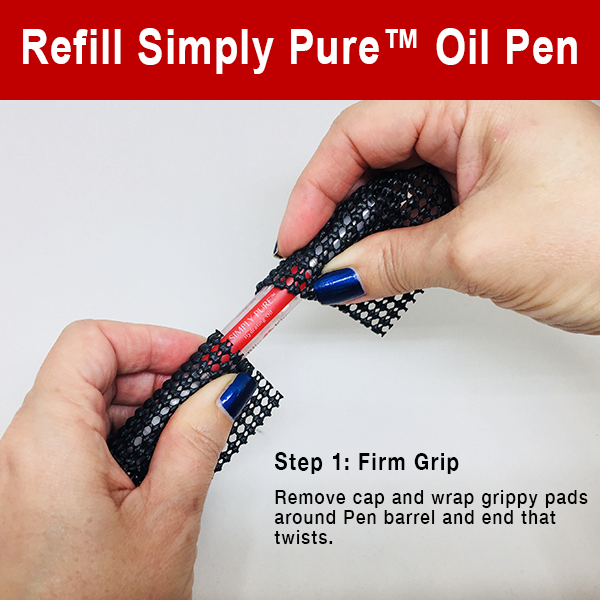
Step 1
Wrap grippy pads around the pen barrel and the end that twists.
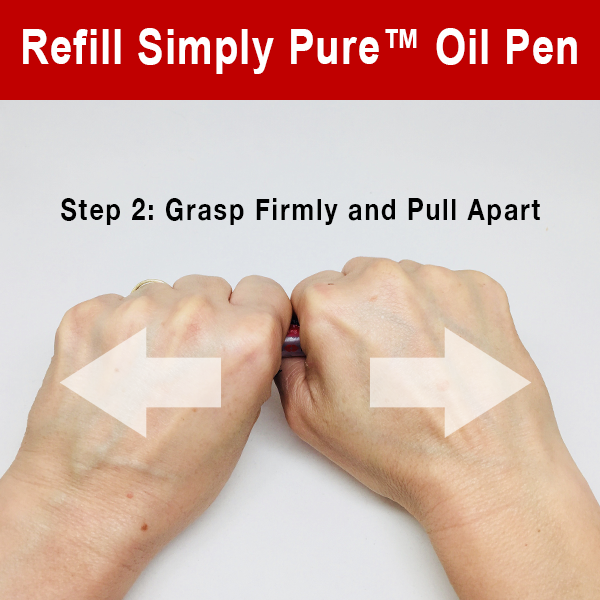
Step 2
Firmly grasp the center barrel and the twisty end portion and pull apart. This step requires significant strength. Of course, my husband, Cory, (the hand model) simply puts his hands together and just tightens them without pulling. I feel like such a wimpy girl trying to pull these apart when he does it so easily.
Step 3
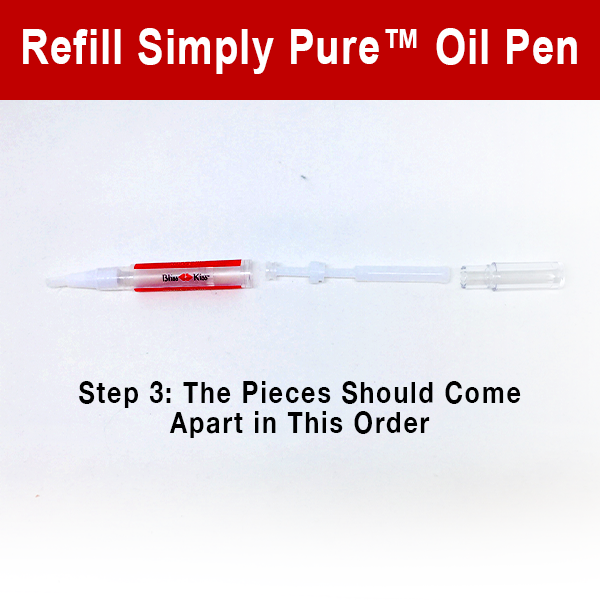
Once the pieces are apart, arrange them in this order.
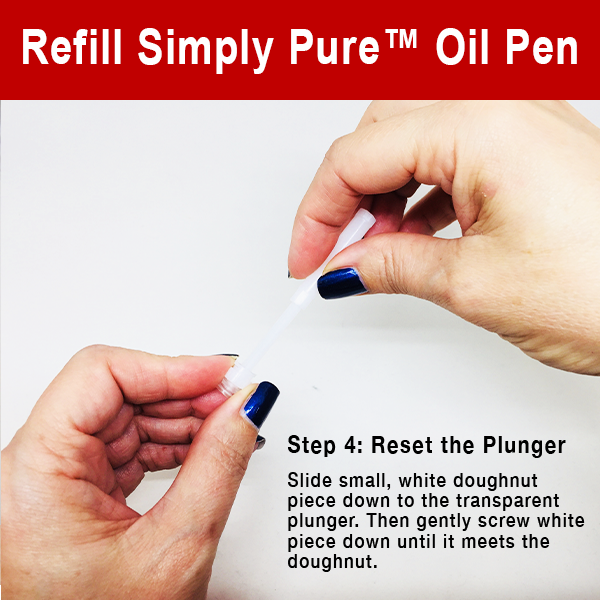
 Step 4
Reset The Plunger: Slide the small, white donut piece down to the transparent plunger. Then screw the large white piece in the right hand down (counter-clockwise) until it meets the donut.
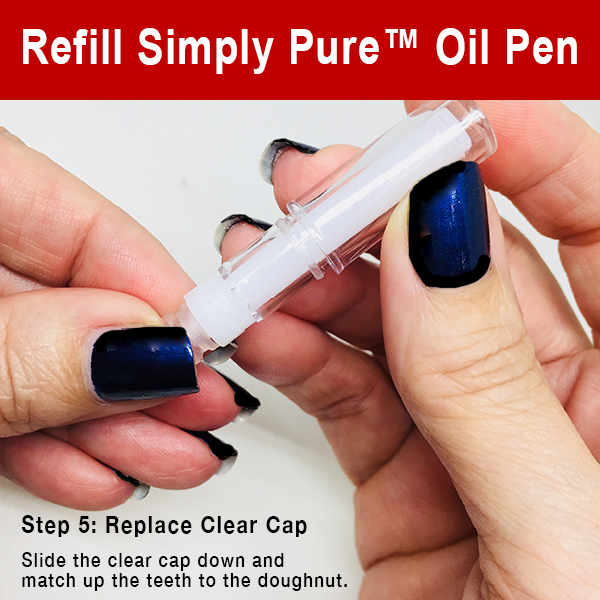
Step 5
Replace the Clear Cap: Slide the clear cap down and match the teeth in the donut.
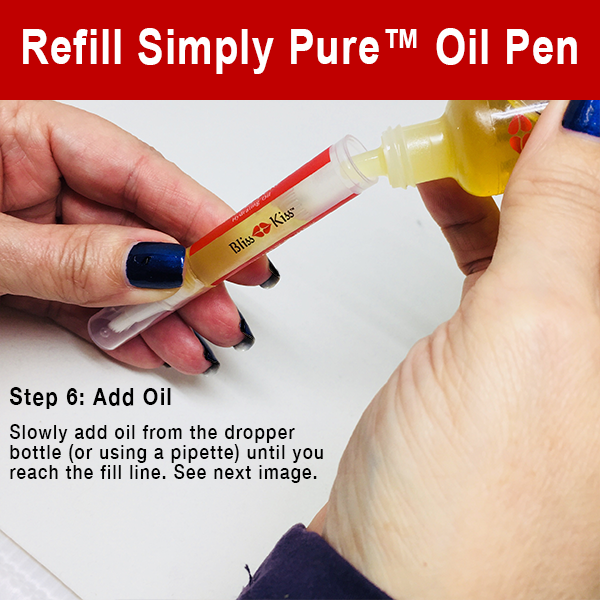
Step 6
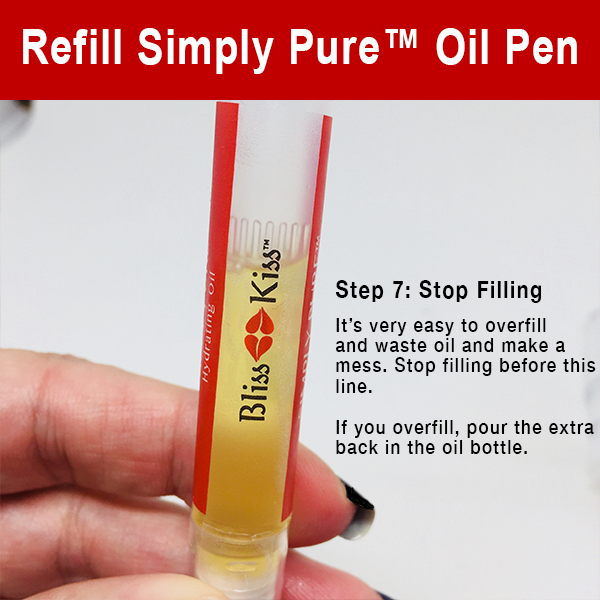
Add Oil: Slowly add Pure Nail Oil from the dropper bottle until you reach the level in photograph Step 7.
 Step 7
Stop Refilling: At this point in the photo. It's very easy to over fill the pen barrel, resulting in a big mess in the following steps.
Step 8
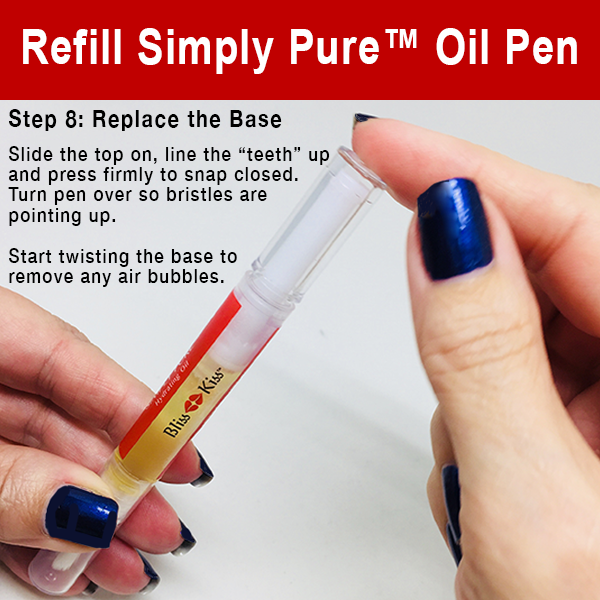
Replace The Top: Slide the top section on, matching the teeth and snap closed. Turn the pen over so the bristles are pointed up. Start twisting the plunger to remove any air bubbles.
Trouble Shooting
Again, our pens are manufactured as one-time use only. We are not able to guarantee a pen that stops functioning after refilling.
Transparent Plunger is Stuck
Since the pens are sold as a "single use" item, sometimes they break upon the first attempt, and some last for several refills.
When you pull the pen apart, try to pull carefully and as straight as possible for best results.
Here's how to know if the pen is beyond hope.
There is a small button (nub) of plastic at the end of the rod that snaps into the transparent plunger. If this button is still there, then it is possible to push the button back into the center hole of the plunger. Then you can slowly extract the whole thing.
If you have the nub, you may need to fully unscrew the screw part and use needle nose pliers to try to snap that nub back into the clear donut in the pen.
If the button has broken off, then there is no hope of repairing it.
3 Minute Video Tutorial
Courtesy of Erica's Nails and More If the video isn't showing up click here to view Erica's video on YouTube.
You're Ready to Go!
Your pen is completely full and ready to go. Congratulations! You did it!
If you ever have any questions, please email info@myblisskiss.com
 US Dollars
 CAD
CAD
 Euro
Euro


